Identifying where you’re spending most of your hard earned dollars is not that hard if you know the right services/tools within AWS. In this article we will focus on a few of those. We will also set a CloudWatch Alarm that rings if your monthly AWS spend is higher that what you think you should be spending.
Tag Editor
Tagging resources is one of the respectful things you can do while provisioning a resource. A project consists of multiple resources and an AWS Account consists of multiple projects. Provisioning them without tagging is unprofessional. Read on, and you’ll understand the ‘why’. There are also Tag Policies that you apply to an individual account or an AWS Organization. Such policies will monitor the tags you set for a resource and report if they are non-compliant. You can identify the non-compliant resources and correct the tag which in-turn helps in identifying the cost for that resource.
Cost Allocation Tag
Tags you set for a resource is just normal until you promote it to something called ‘Cost Allocation Tag’. For a tag to be eligible to help in calculating cost, it needs to be promoted. You can either do it at the AWS Account level or in the Payer Account, if your AWS Account is under an AWS Organization. Cost Allocation Tags — there are two of ‘em.
- User Defined — when you want to promote your own tags for your customized requirements.
- AWS Generated — tags that start with ‘aws::xxx’. You just need to Activate the tag.
To Activate a tag to be used as Cost Allocation Tag, all you’ve to do is find the tag from Billing and Cost Management Console > Cost Organization > Cost Allocation Tags, Click on either tab — User-defined cost allocation tags/AWS generated cost allocation tags > Checkbox the tag you wish to promote and click ‘Activate’

Cost Allocation Tags
Tags are sensitive to casing & spacing. Here in this screenshot, see the fourth item — ‘Account’. If you tag ten of your resources using ‘Account’ tag and other ten using ‘Account ’ tag (there’s a space in there!), both will be treated as separated groups while filtering them in Cost Explorer.
Resource Groups
Keeping things organized is one of the primary tasks of anyone who’s managing an AWS Account. Resource Groups is here to do that. Who would not want to use a service when it is FREE and works in a few clicks?

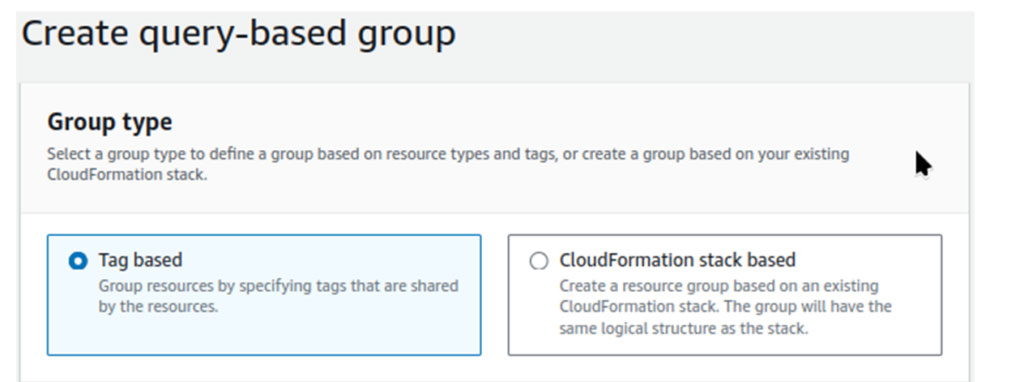
create a new Resource Group
When you’re all set to create a new Resource Group, you’re presented with two options — to create a Tag Based group or a group based on the resources that CloudFormation has created for you. Pick either and select respective tags for Tag Based and a stack for Cloudformation Stack Based. You’ll get to see a preview of resources that are about to be added. Review carefully and add those resources. It should be completed soon.
Cost Optimization Hub
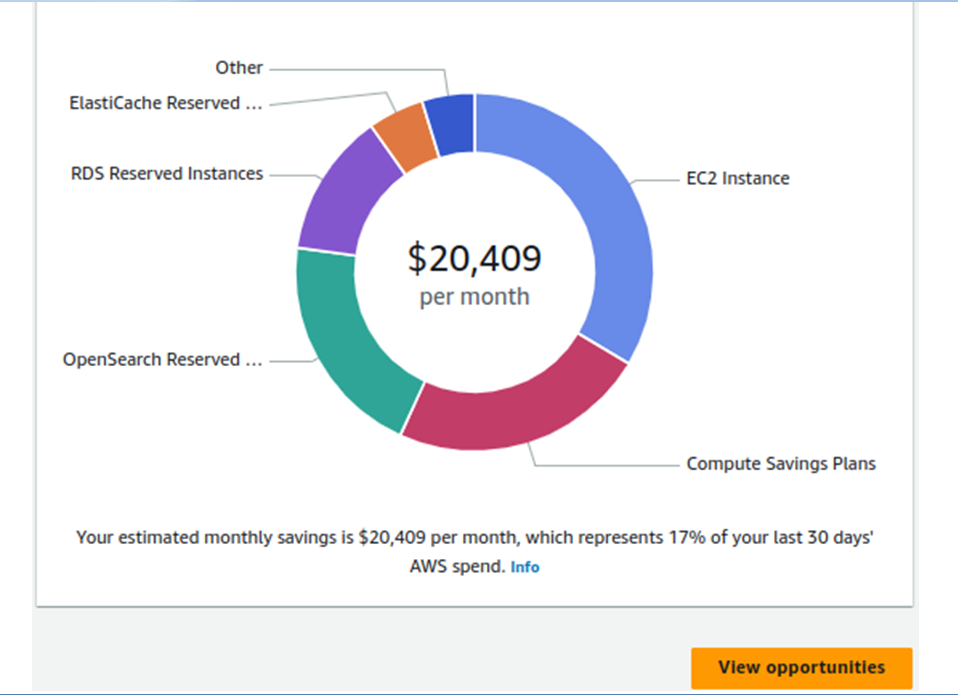
In the Billing and Cost Management console, there’s a Cost Optimization Hub feature that will analyze your AWS Account and list the services where you can use reserved instances/savings plans and advise on EC2 Instance type. It gives you estimated savings in percentage for a particular resource along with complexity of the implementation effort.
Not to my surprise, the EC2 Instance recommendations advise you to migrate to AWS Homegrown Graviton Processor. Before even considering this option, check whether your application is compatible with the processor by migrating the development/staging to Graviton and through thorough testing.

Cost Optimization Hub — Overview
Cost Optimization— feature in Trusted Advisor
This feature checks for service level optimization along with under-utilized and over-utilized resources. It also presents you with a Recommended Action that you can take to optimize the resource.
Configuring Billing Alerts
After doing all these optimizations for a while, you might be interested in setting an alert that sends you an email if your AWS Bill has reached a certain threshold.

Head to CloudWatch > Alarms > Billing and click ‘Create Alarm’. Browse to the Billing section and use ‘Total Estimated Charge’ and select ‘EstimatedCharges’. Define a threshold and click ‘Next’. On the Notification section you see on the next screen, use the ‘Send a notification to…’ to send the alert to an SNS Topic. Subscribe the SNS topic with your email address.
Budgets
AWS Budgets is a newer and improved feature to find and forecast the cost and usage. Oops there’s so much ‘and’s. But believe me, AWS Budget does it all! It calculates
- Cost and Usage
- Reserved Instances Usage and Coverage
- Savings Plan Usage and Coverage
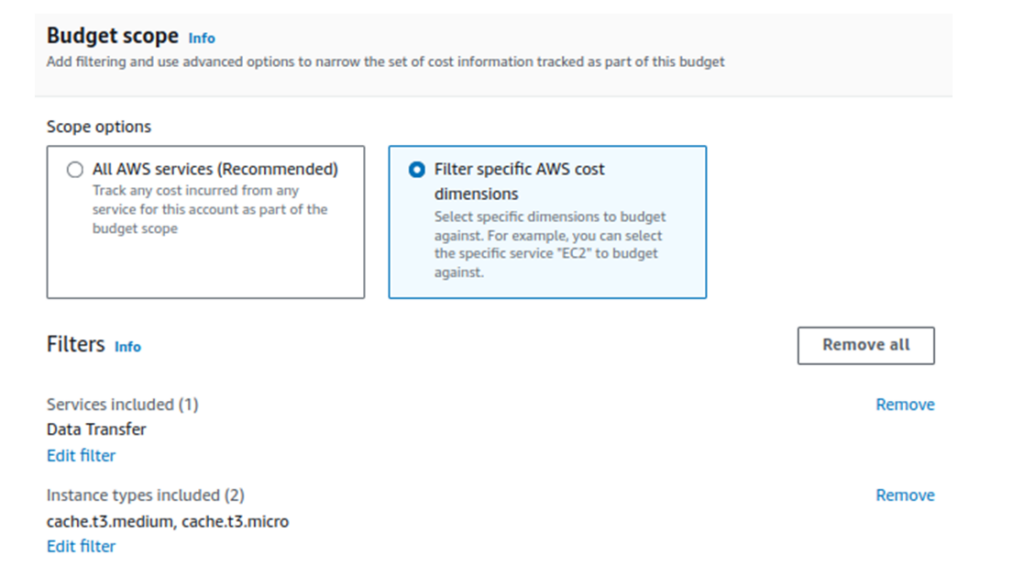
You can set these up in the console with the click of ‘Create a budget’ button and a few clicks. The beauty is in adding various filters that you can add in ‘Budget Scope’.

Setting the Budget Scope
Identifying where you are spending too much is the first step towards the start of the journey of Optimizing Cost in AWS or any Cloud Provider. A simple misconfiguration is more than enough to empty your pocket.
Build Smarter Data Solutions on AWS
Curious About AWS Best Practices?
Our AWS consulting team brings years of enterprise cloud experience to help you architect, optimize, and secure your cloud infrastructure. Let’s explore the possibilities!

